"Modular" series
Modular Series Audio Racks
The Model "Eris 6DW and Eris 9TW"
Assemble lower frame rail:
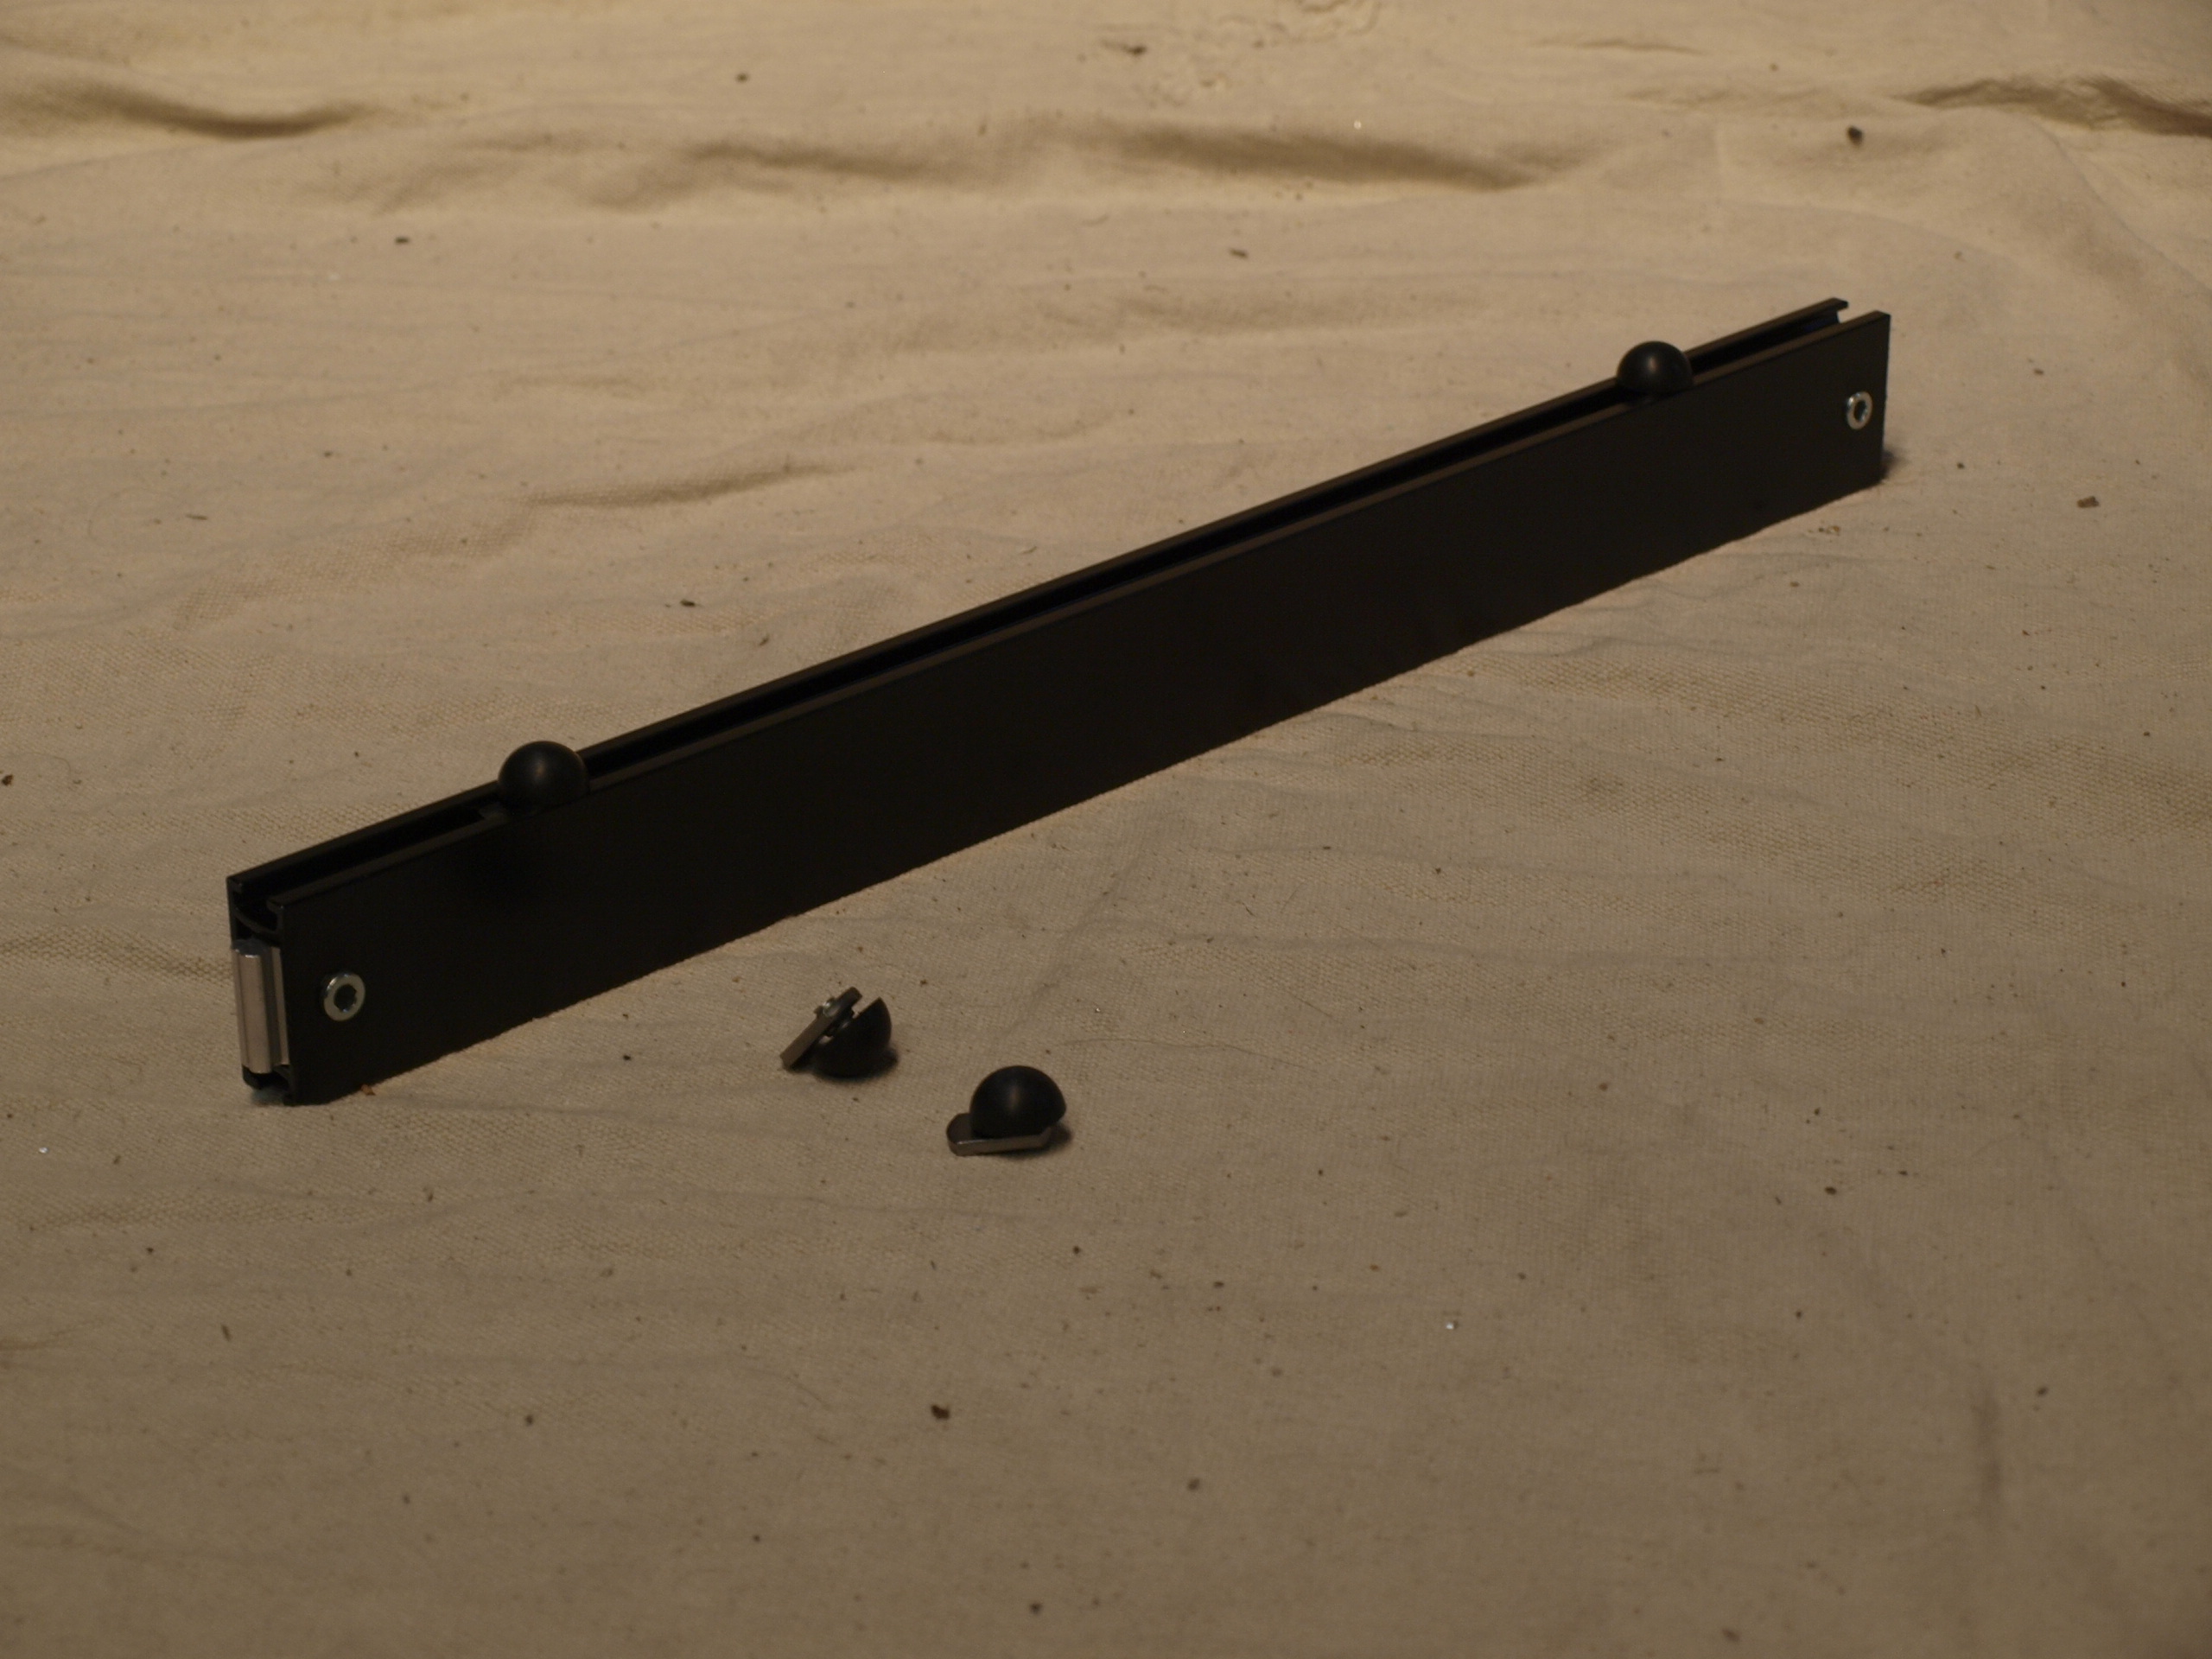
Locate the 19.5 inch long frame rails. Place the shorter 13.5 inch rails out of your way for now. Insert platform support bushings by sliding the threaded rod and nut into the slot on the frame rail. Place one bushing at each end of frame rail about 2 to 3 inches from each end. Finger tighten only. Repeat this step for all of the 19.5 inch rails. Note: Bushings are not used with the shorter 13.5 inch rails.
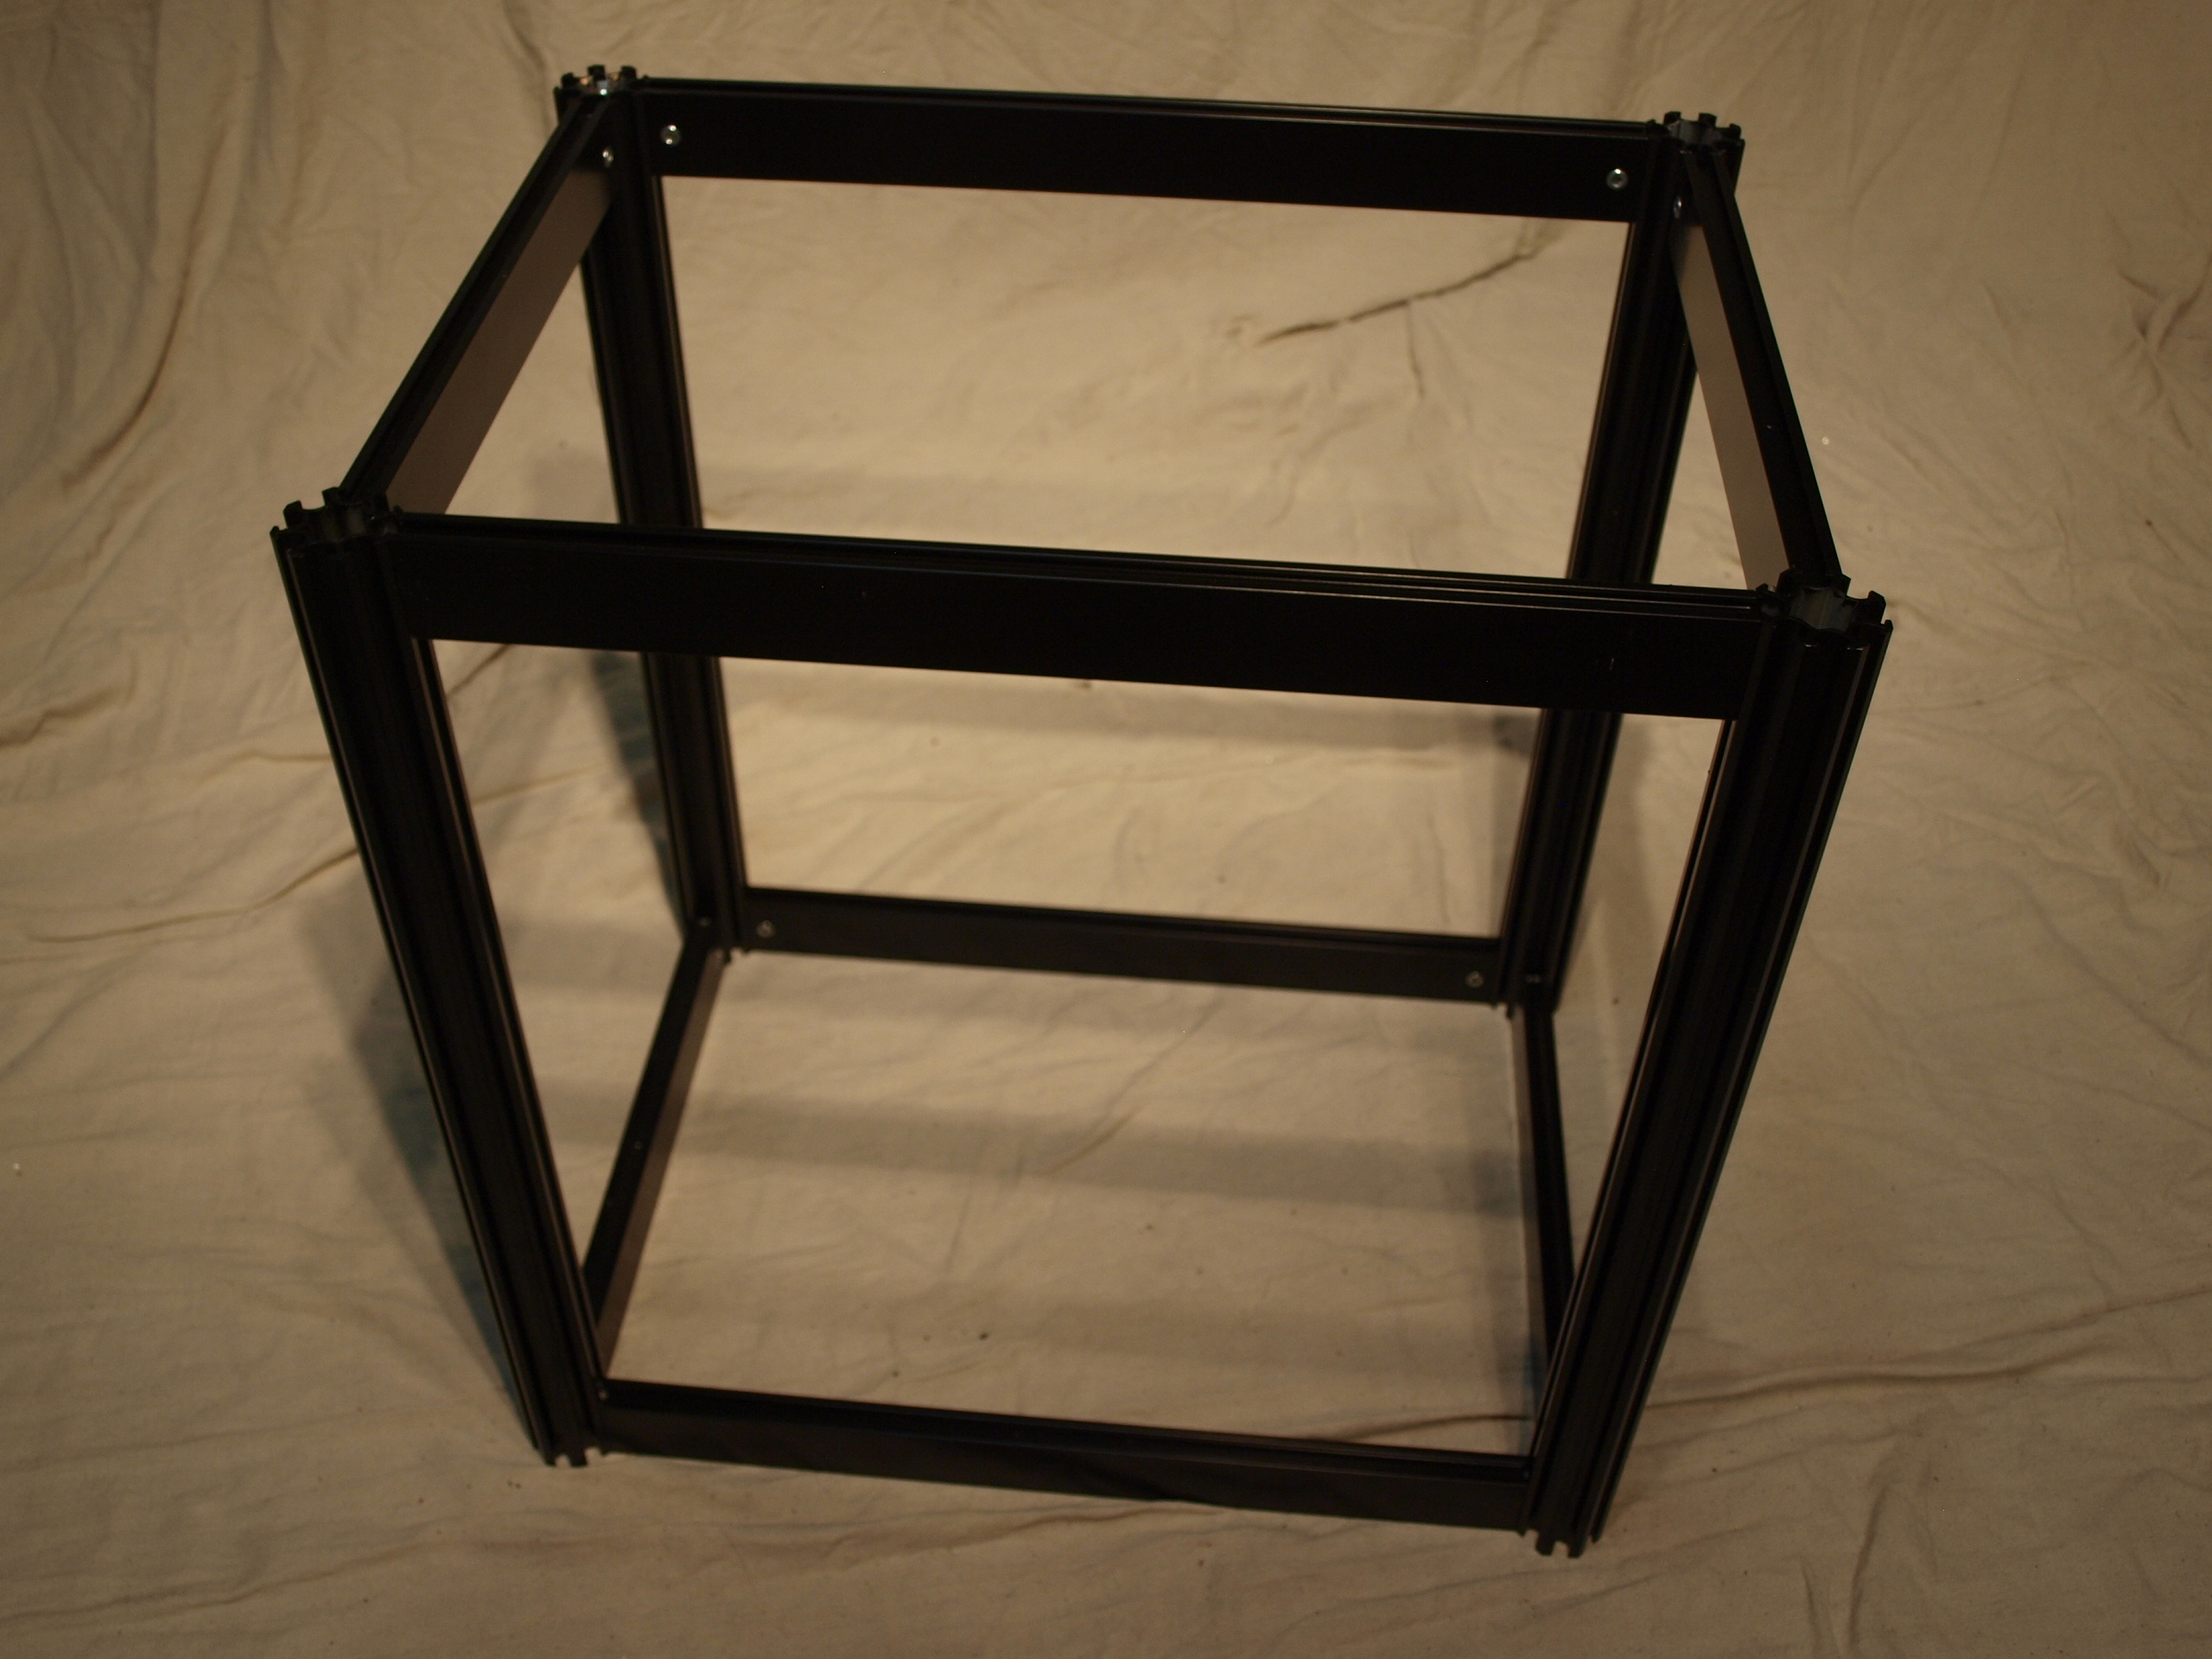
Attach frame rails to columns:
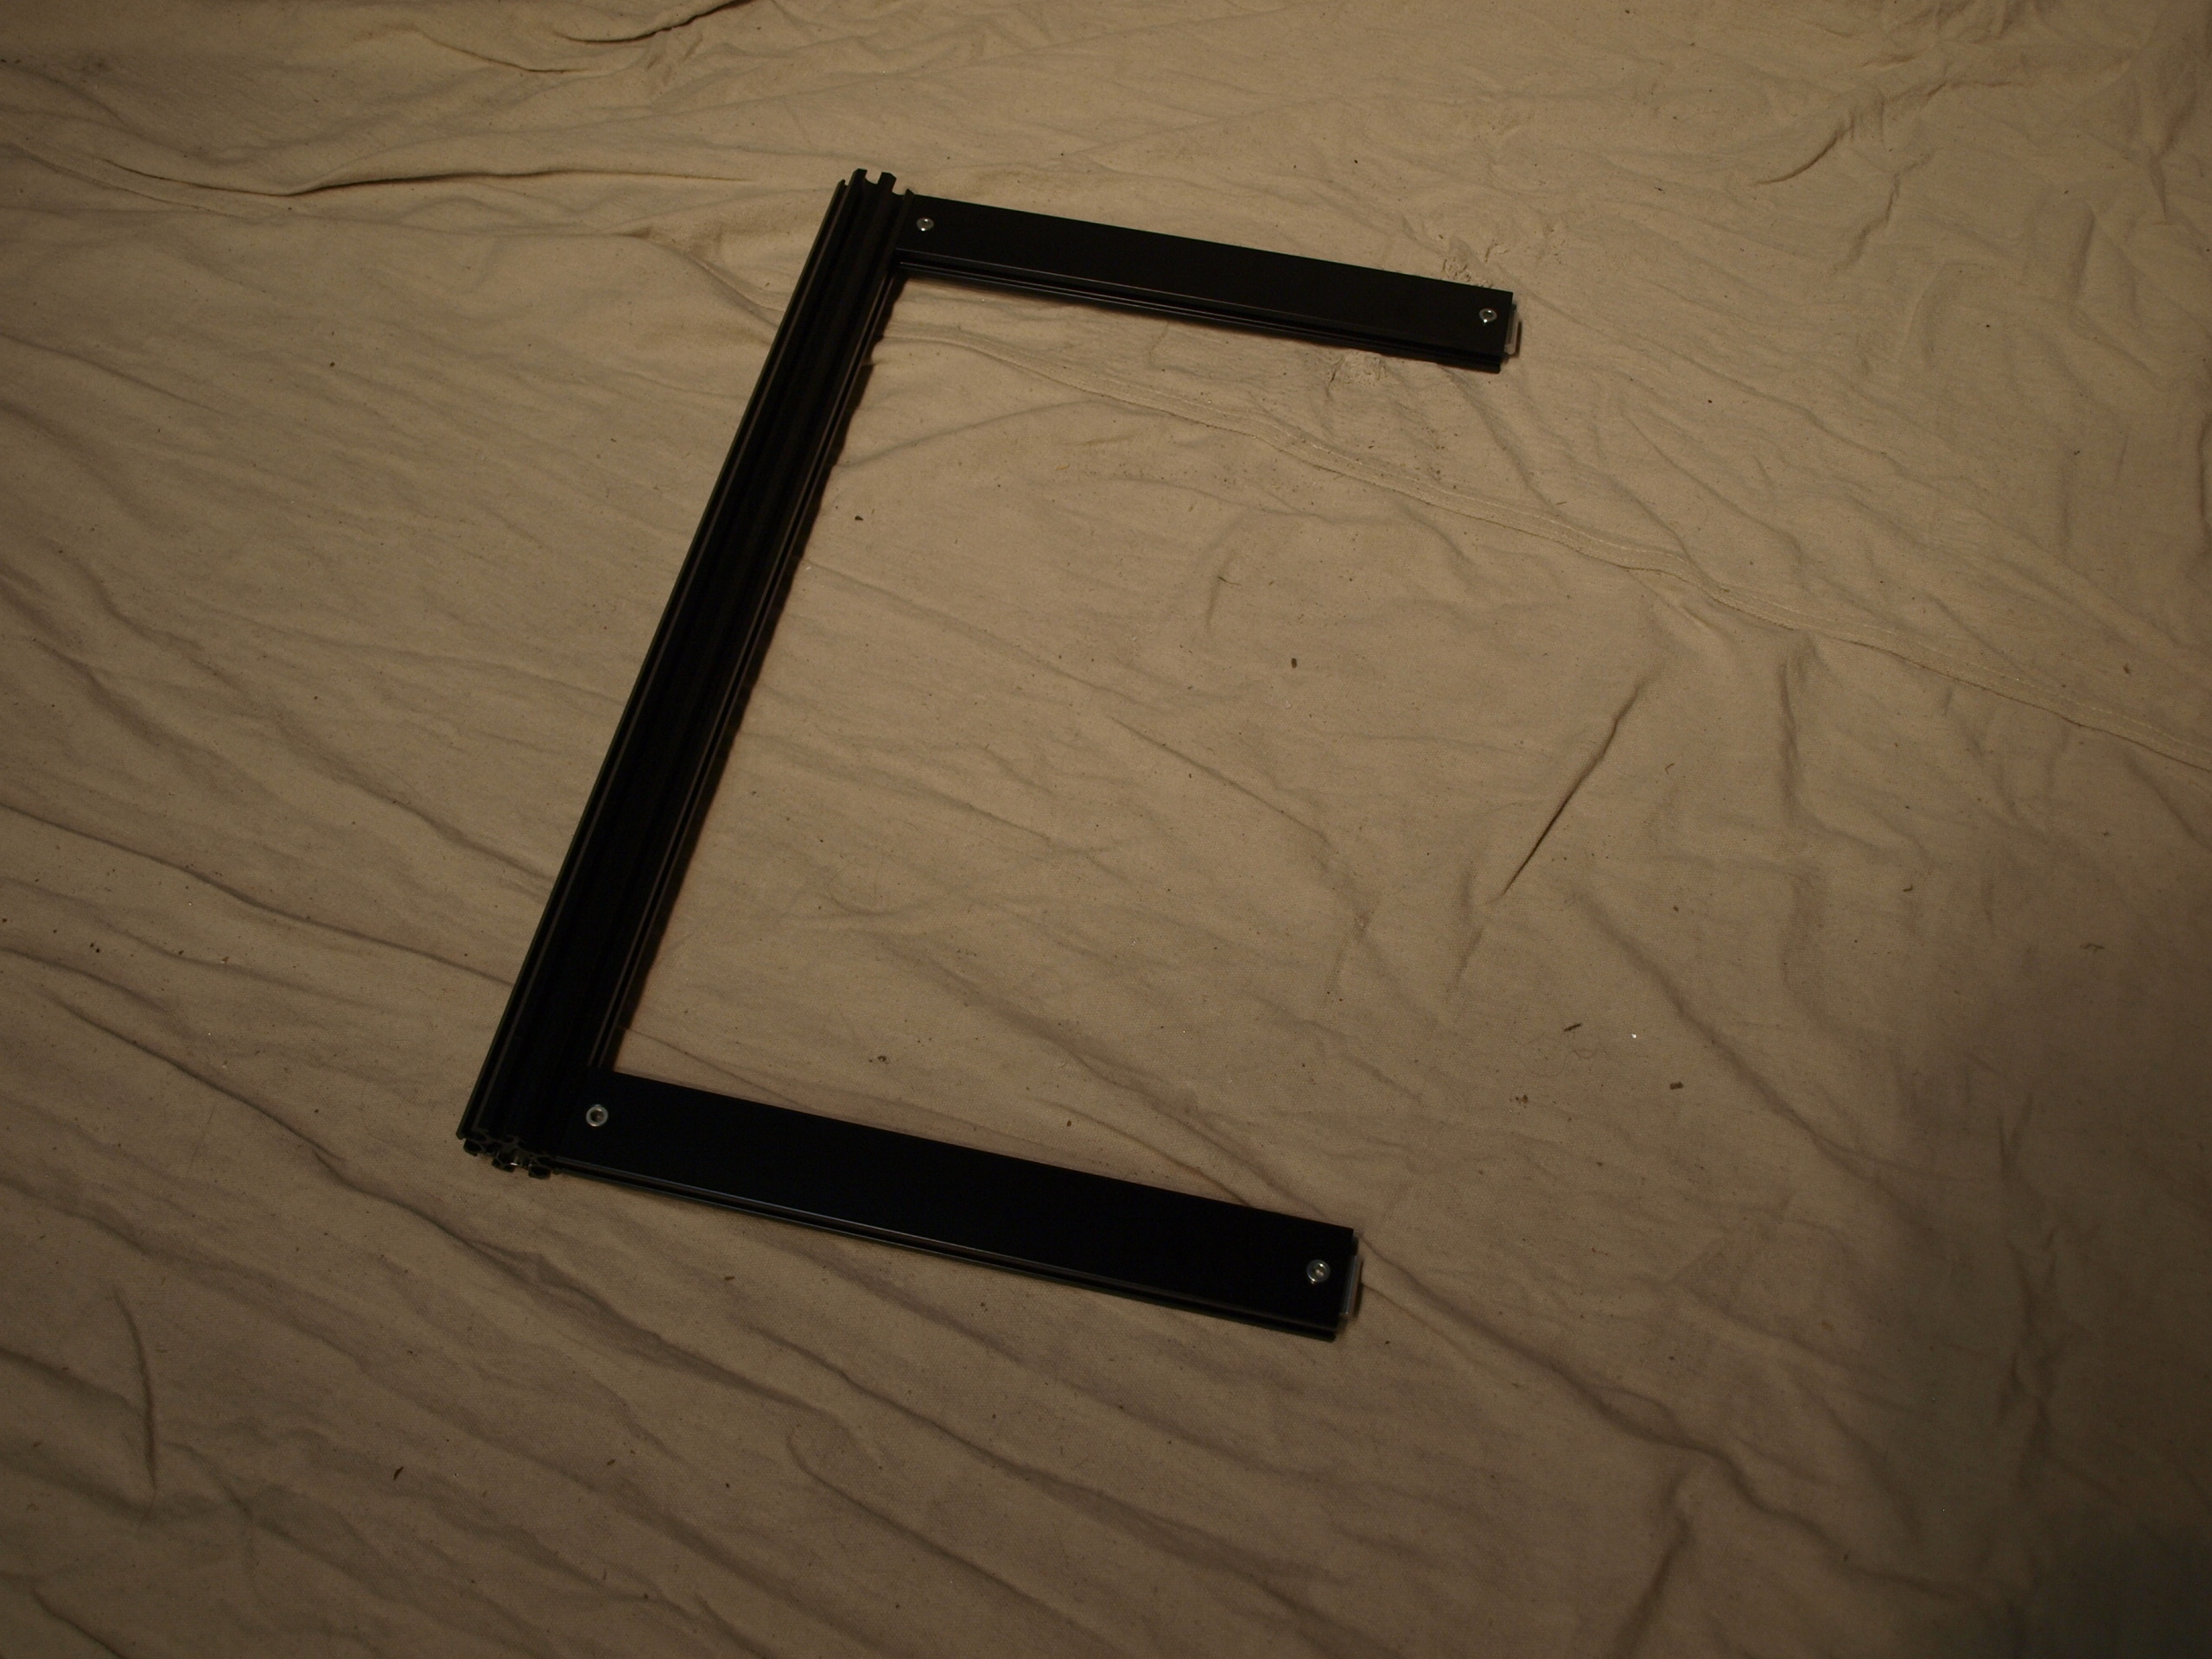
Locate two columns and two 13.5 inch frame rails.
Identify the bottom end the column which has a threaded insert and have this end face you.
Attach the lower frame rail to the column.
Tighten the lock assembly using allen wrench.
Repeat for upper frame railing.
Attach second column to frame rail, noting the threaded insert is facing you, and tighten the lock assemblies.
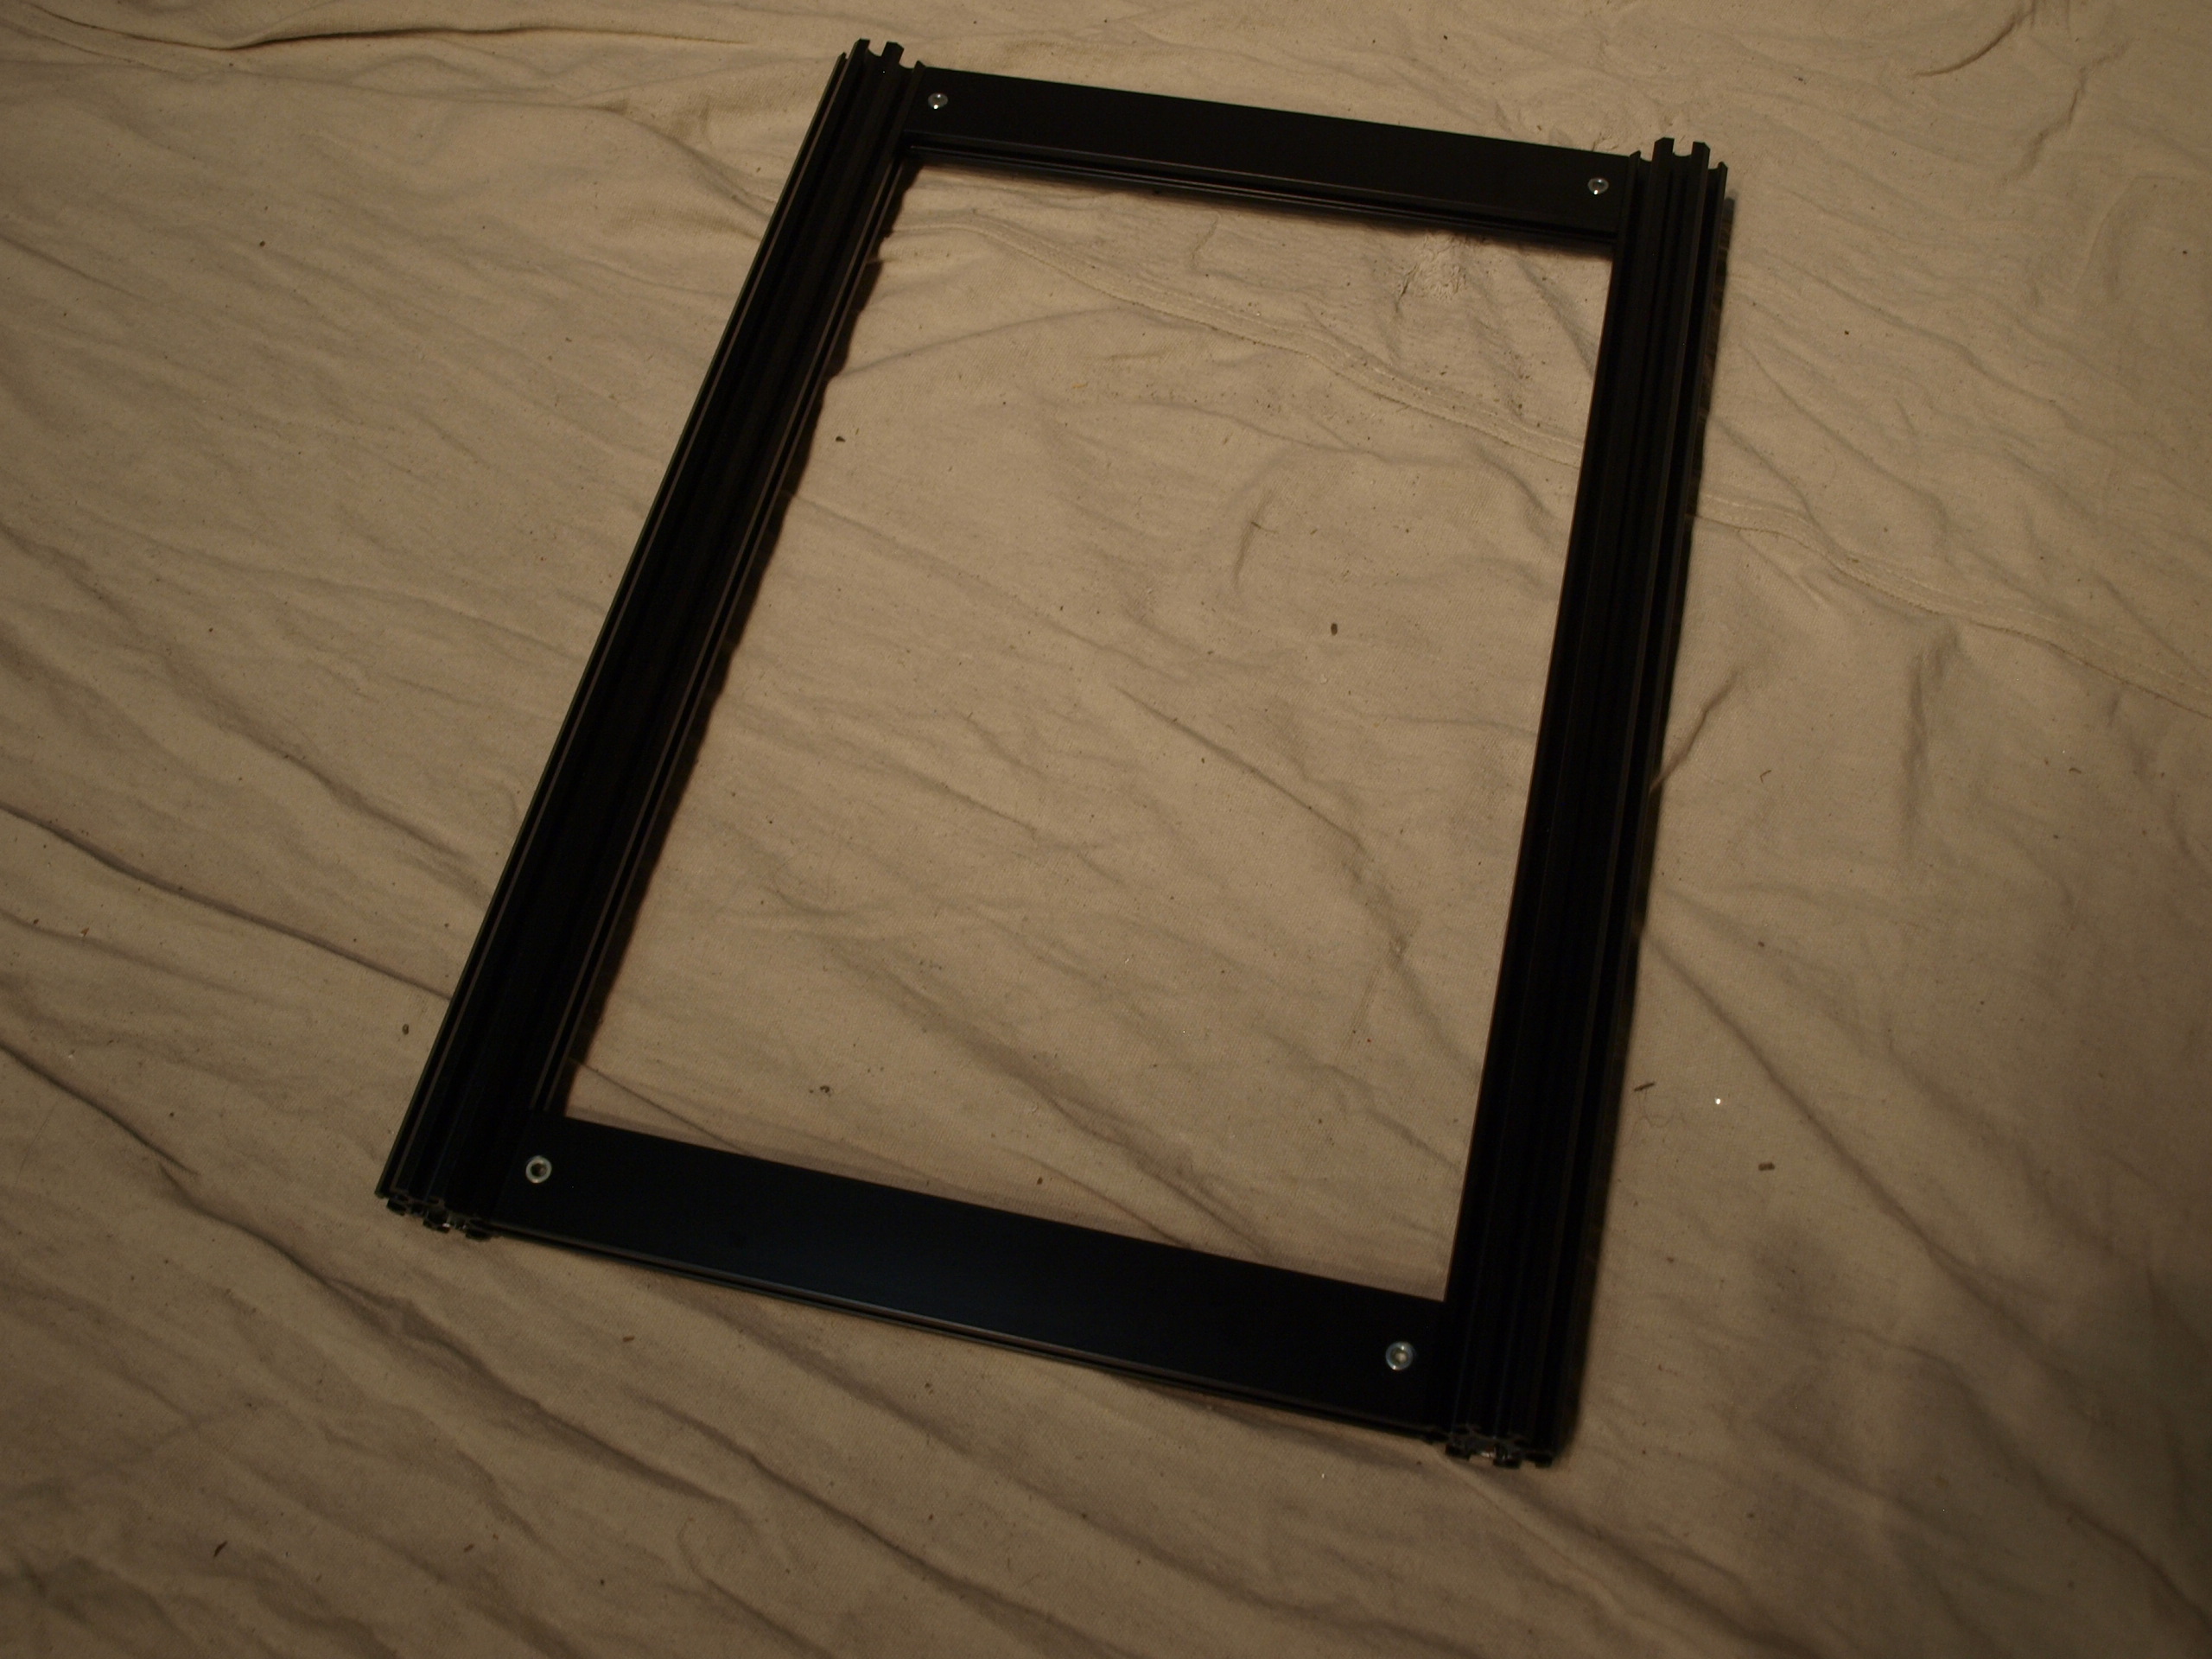
Install second column to complete the side-frame assembly:
Attach second column to frame rail, noting the threaded insert is facing you, and tighten the lock assemblies. Repeat this procedure for the remaining columns and 13.5 inch frame rails.
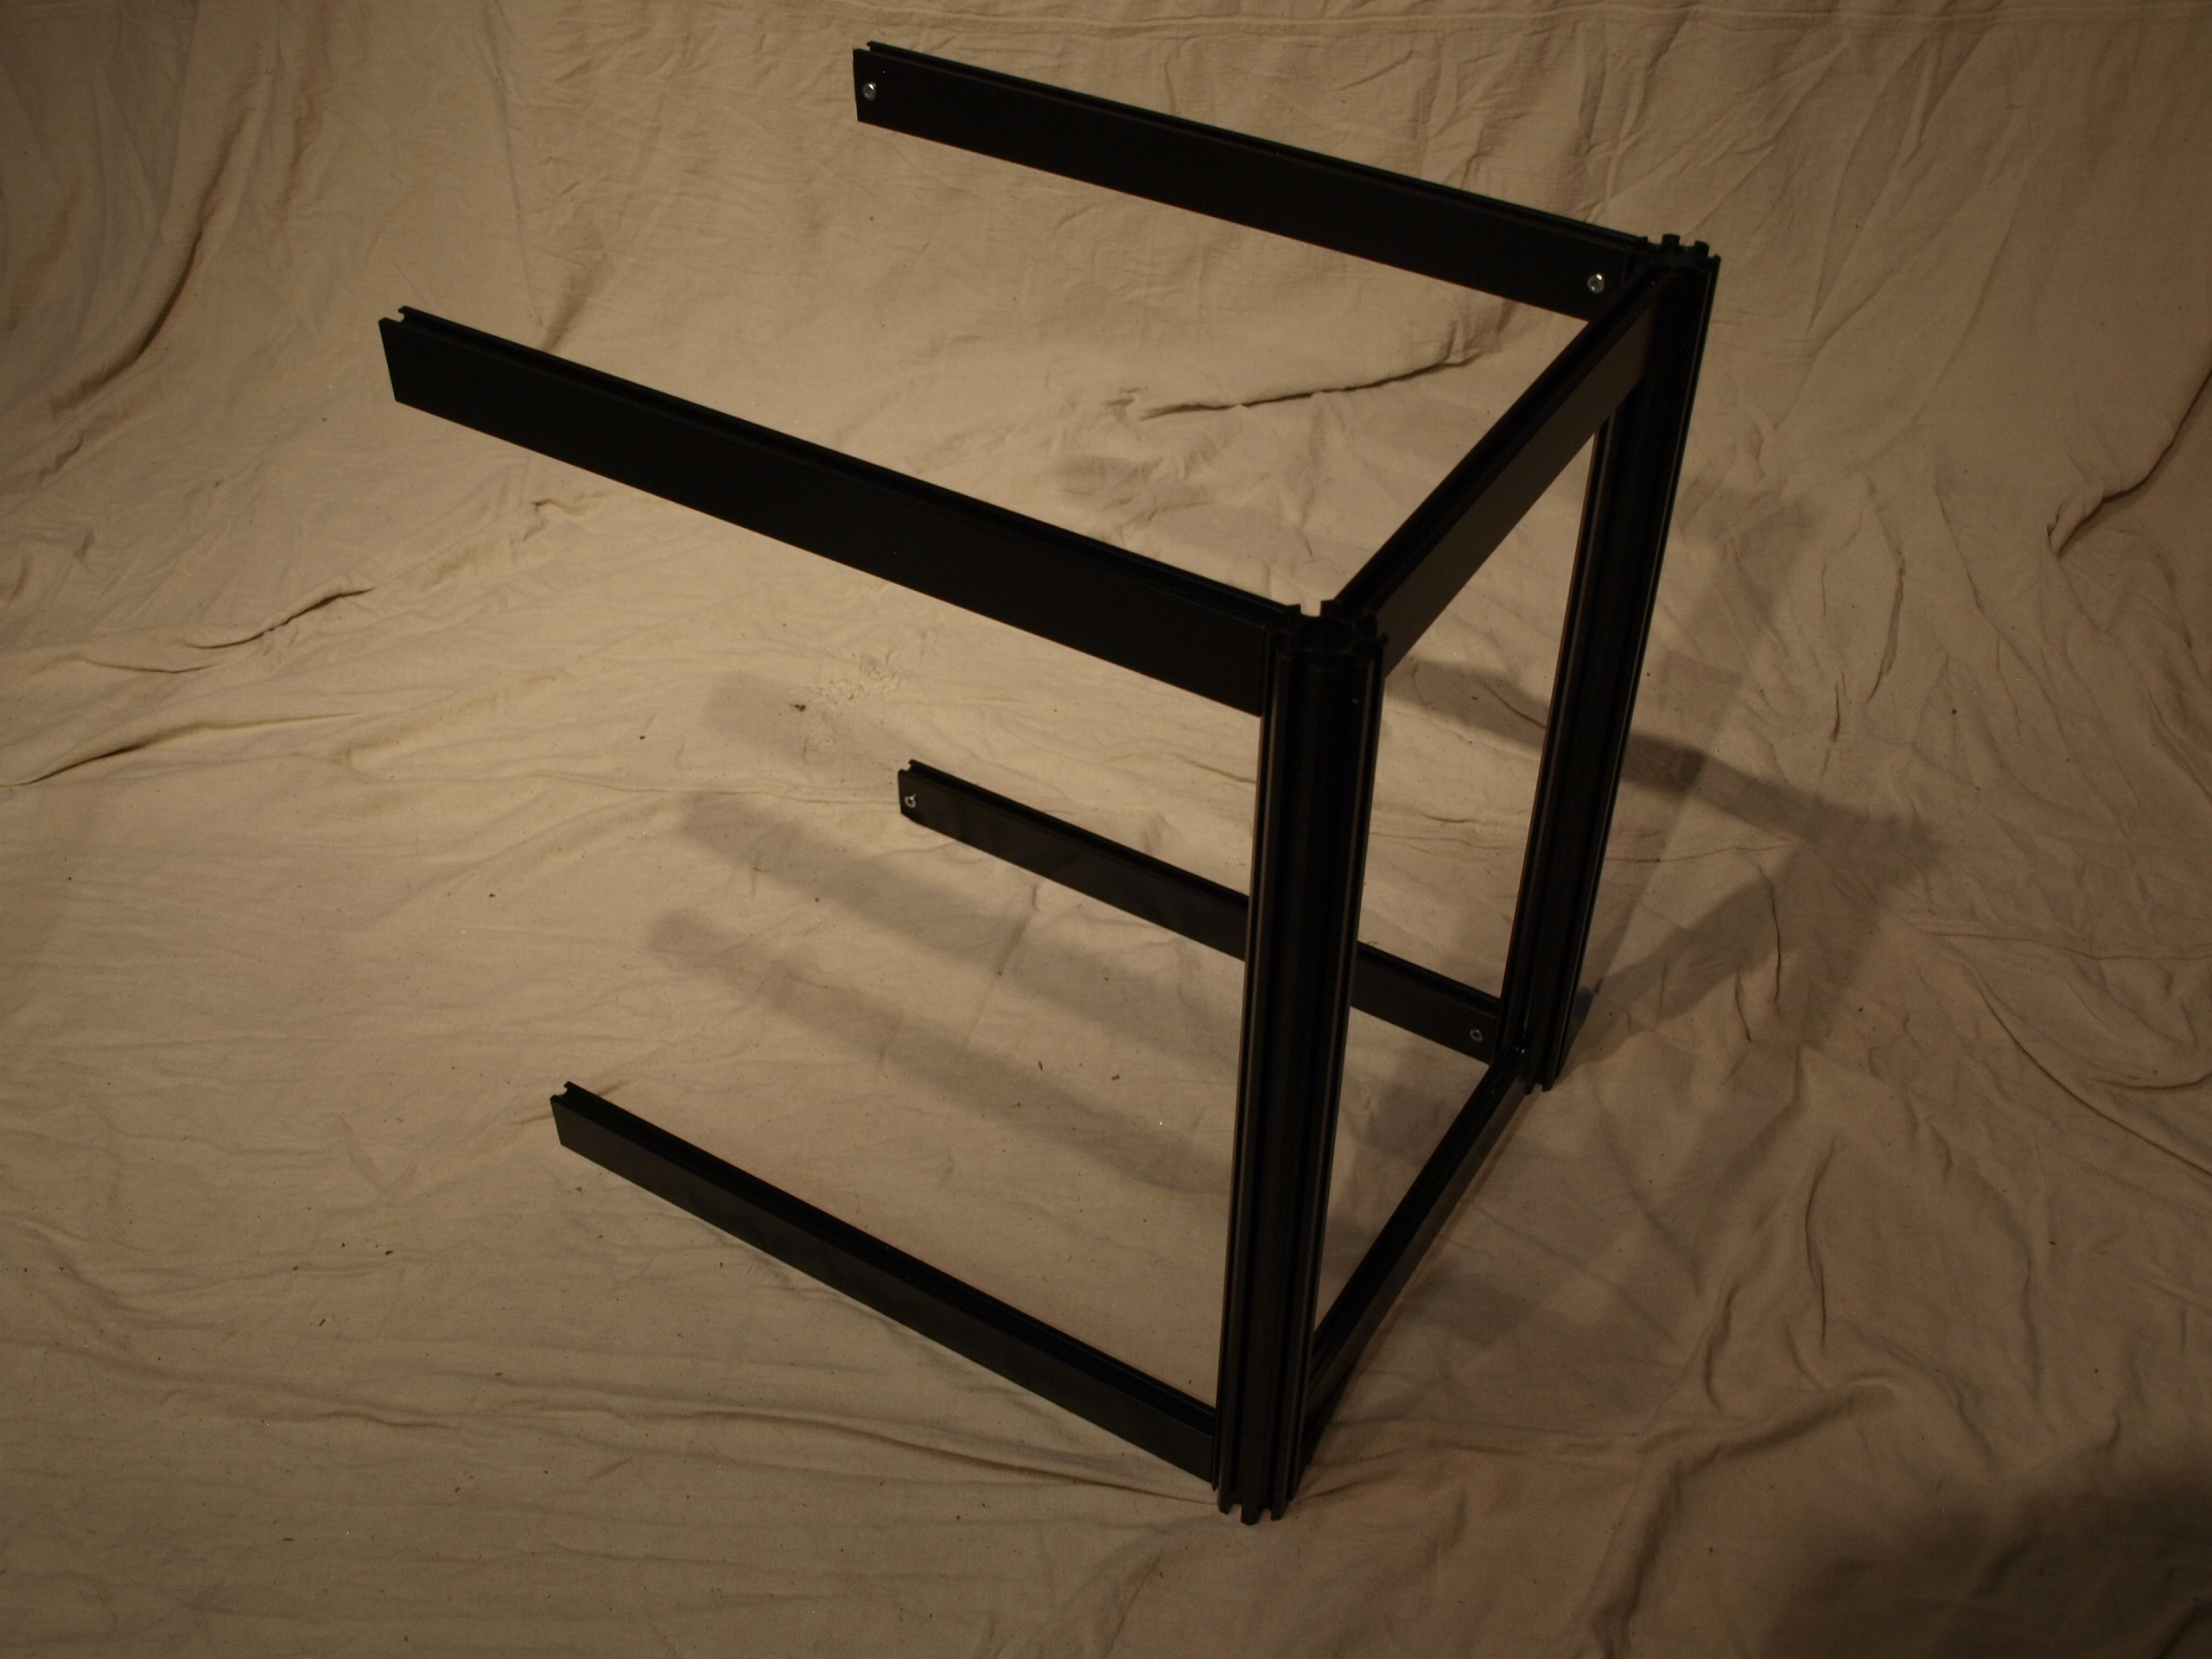
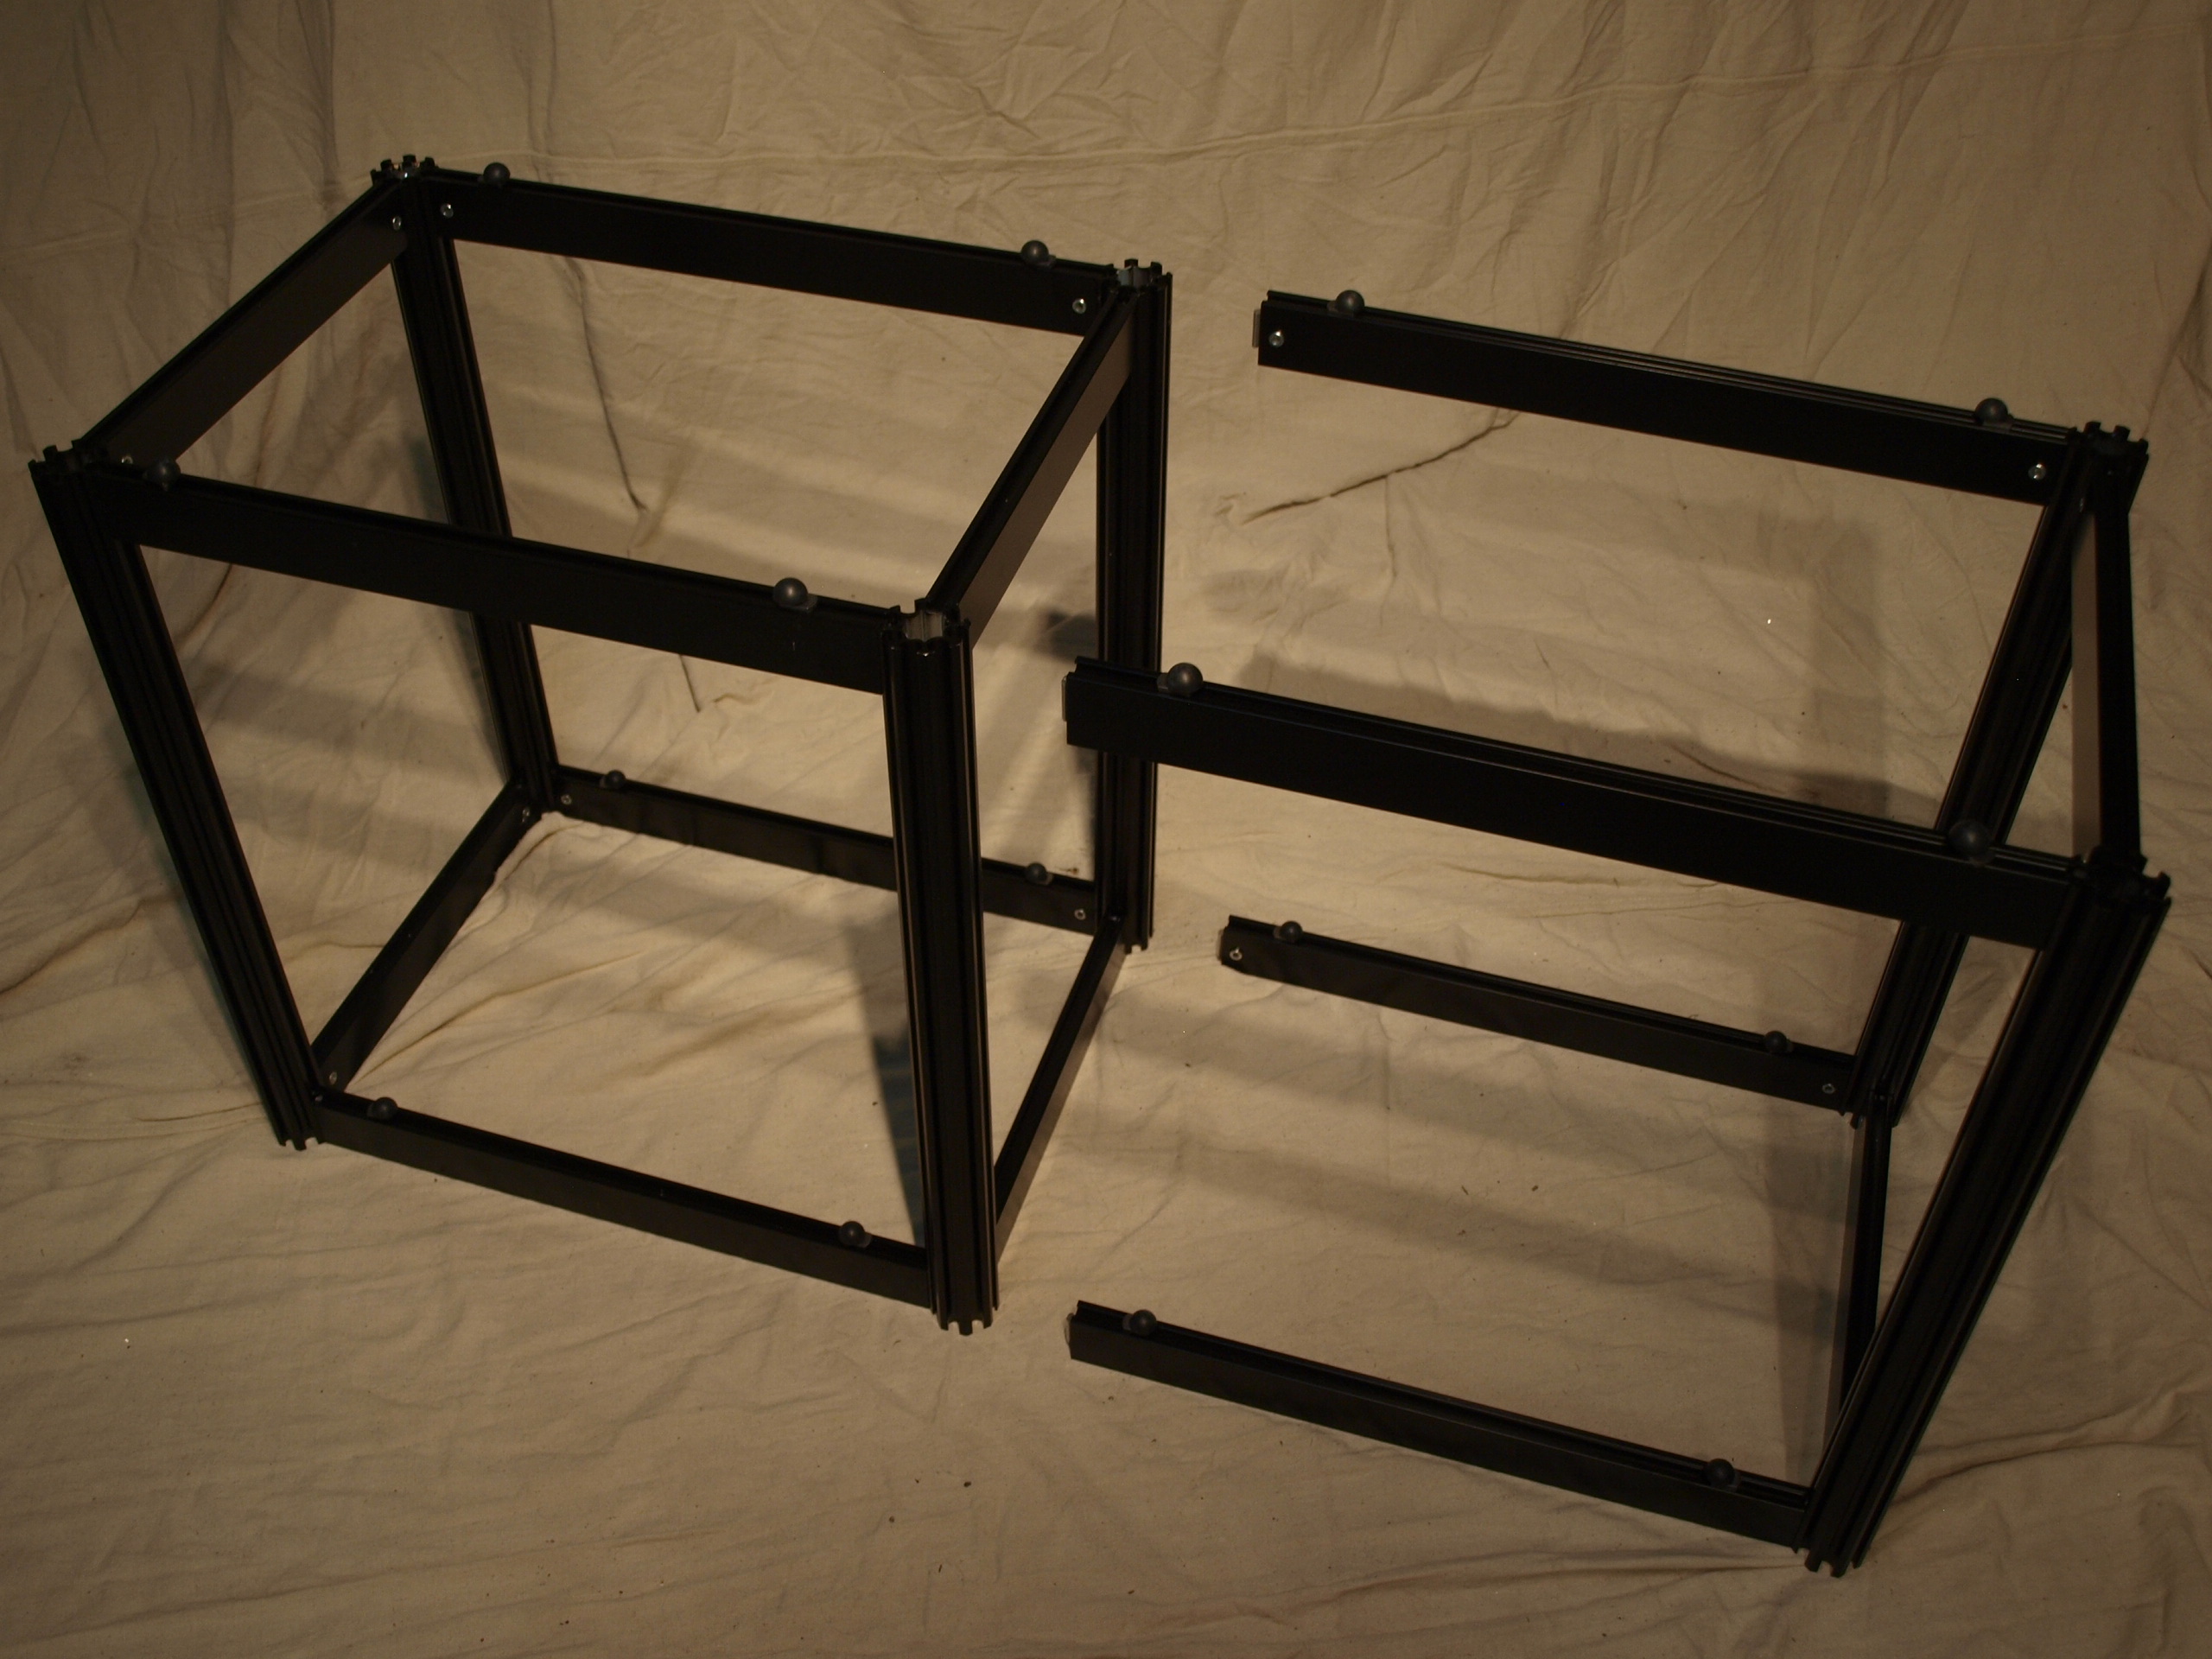
Add the 19.5 inch frame rails:
Locate the 19.5 inch frail rails. Add four 19.5 inch rails to the side-frame assembly as shown in the photo.
Attach second side-frame:
Attach the second side-frame to the assembly as shown. Tighten the connector lock assemblies.
Complete the rack frame:
Repeat step 4 above to create an additional side-frame assembly. .
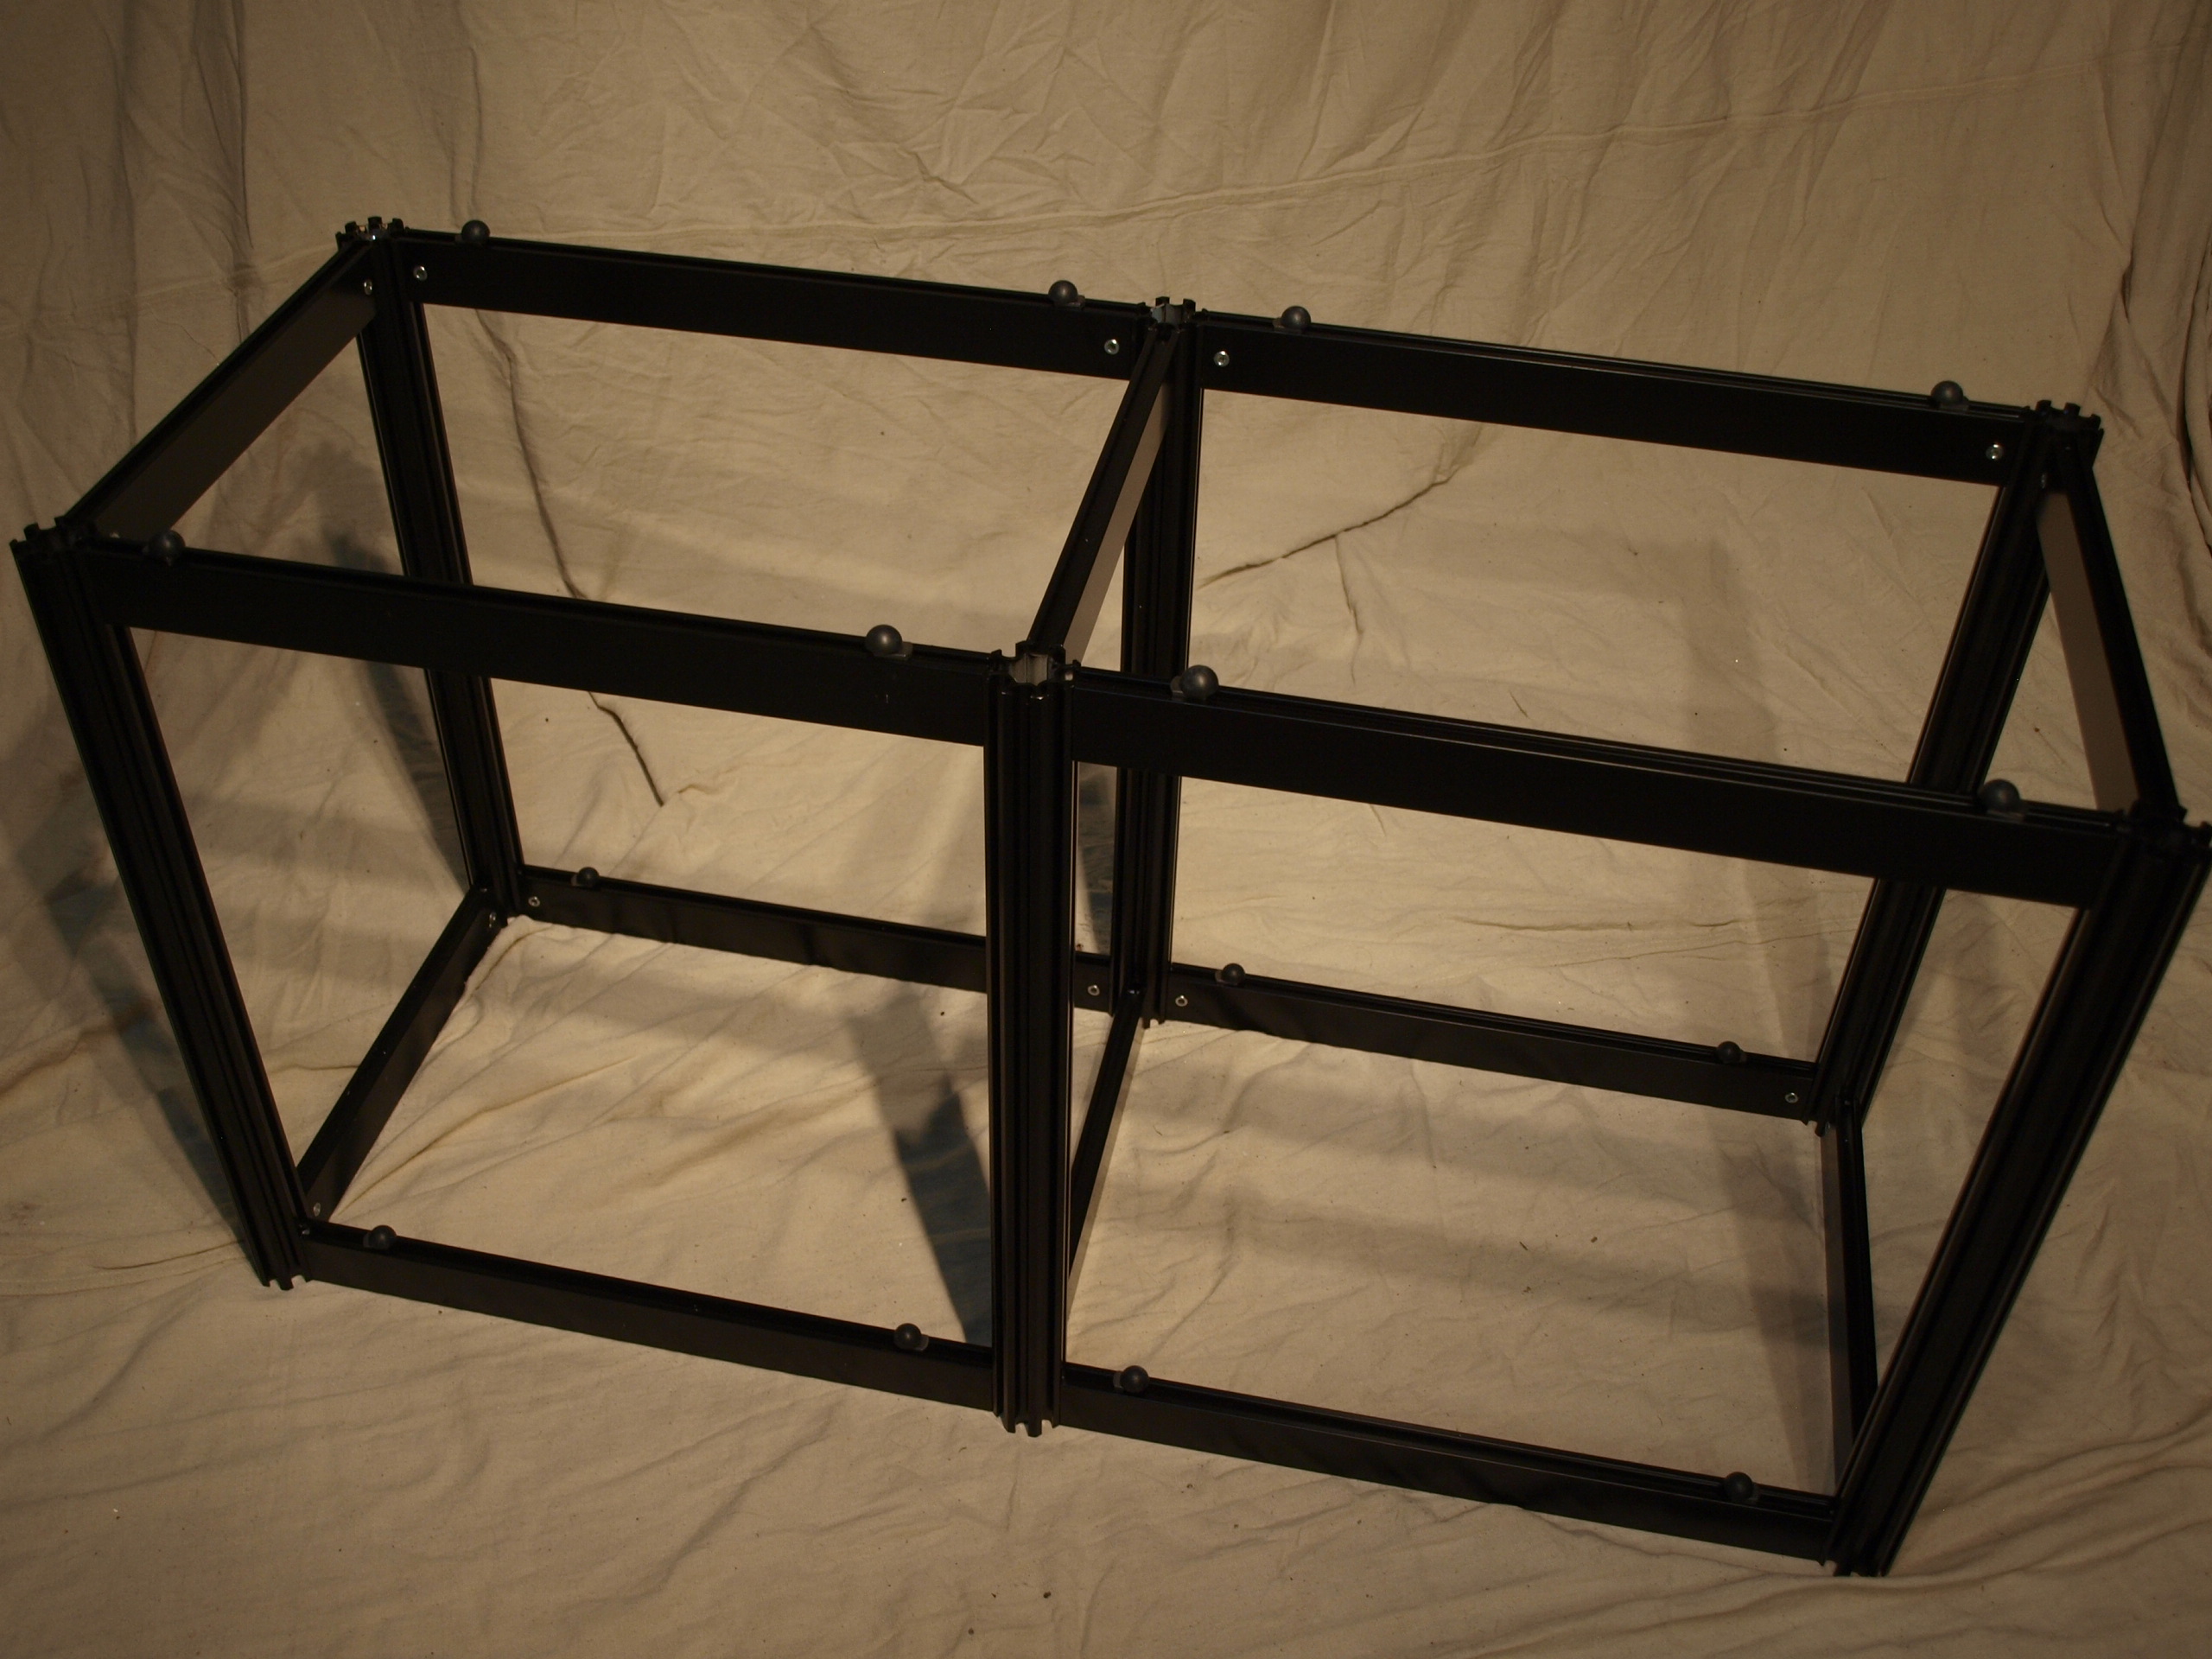
Attach the additional side-frame assembly
Attach the additional side-frame assembly, creating a double-width assembly as shown. Repeat the above steps if building a triple or quad-width rack.
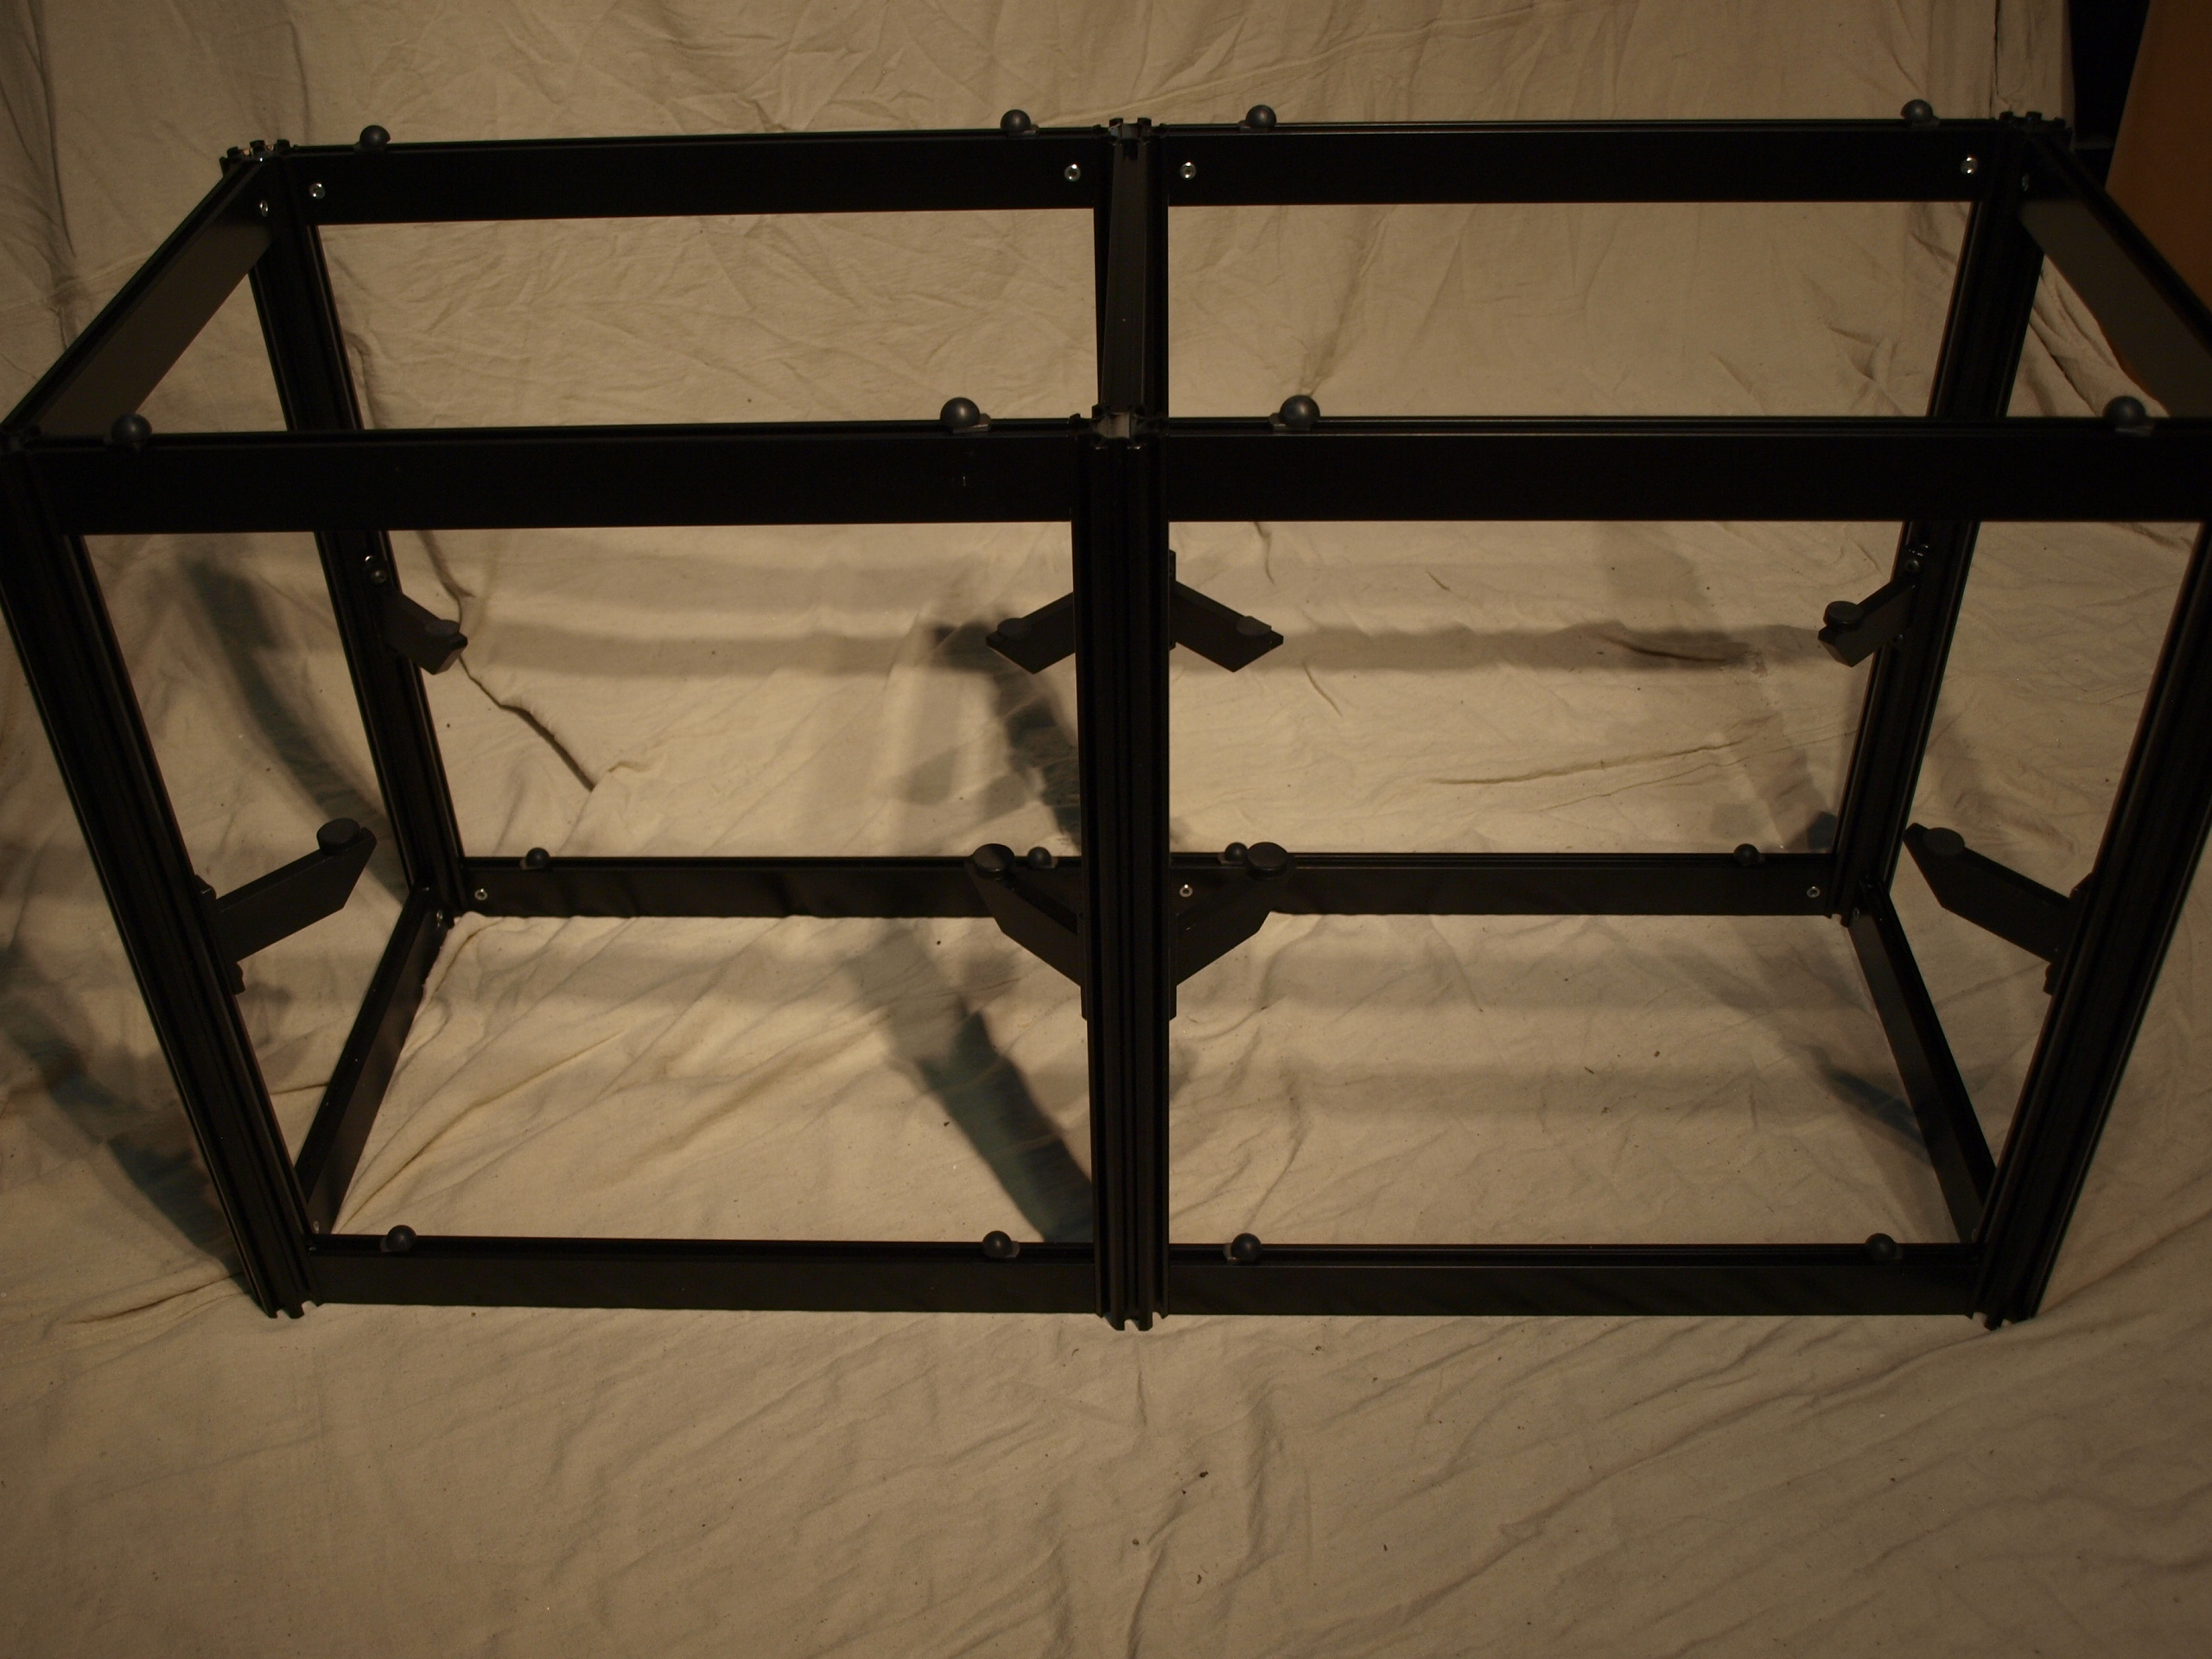
Install platform supports:
Locate a platform support bracket and slightly loosen the mounting hardware. Do not completely remove the mounting hardware. Gently slide a platform support bracket into each of the columns as shown. The supports are placed at a 45 degree angle. Just place the brackets roughly into position and finger tighten. Once you are sure of the exact lacation, you may tighten down the maouting screws.

Completing the rack frame:
Locate the footers. The rack was provided with either brass cone footers, or flat bottom leveling feet. In stall one of these at the bottom of each of the columns. Locate the octagon shaped plastic end caps and install one at the top of each column.

Install the platforms:
Make a final decision on the exact height of each of the platform support brackets. Go back over the entire rack and make sure all of the hardware has been tightened down. Place the rack frame into it's final position. Install the platforms. You rack is complete!
-
Reference Series

-
Signature Series

-
Modular Series

-
Tweaks and DIY Parts
